

Step by Step Phone Screen Protection: Keep Your Device Safe
Your phone screen faces a constant battle against scratches, smudges, and accidental drops every single day. A single slip can cost upwards of £200 in repair bills, with cracked screens accounting for more than 50 percent of all smartphone damage. You might think a screen protector is enough. The real secret is that how you apply and care for it makes all the difference between a flawless screen and a costly disaster. While a screen protector is your first line of defense, pairing it with an iPhone Silicone Case Cover ensures your device is shielded from every angle.
Table of Contents
- Step 1: Assess Your Phone Screen Condition
- Step 2: Choose The Right Screen Protector
- Step 3: Clean The Phone Screen Thoroughly
- Step 4: Apply The Screen Protector Carefully
- Step 5: Verify The Application Is Perfect
- Step 6: Maintain The Screen Protector Regularly
Quick Summary
| Key Point | Explanation |
|---|---|
| 1. Assess your phone screen condition. | Conduct a thorough visual and functional check to identify scratches or damages that may need attention. |
| 2. Choose an appropriate screen protector. | Select a tempered glass screen protector that fits your model and suits your lifestyle for optimal protection. |
| 3. Clean your phone screen thoroughly. | Use a microfibre cloth and suitable cleaning solution to prepare the surface for a flawless screen protector application. |
| 4. Apply the screen protector carefully. | Install the protector in a dust-free environment, ensuring precise alignment and removal of air bubbles or dust. |
| 5. Maintain the screen protector regularly. | Regularly clean and inspect your protector for wear and replace it as necessary to ensure long-lasting protection. |
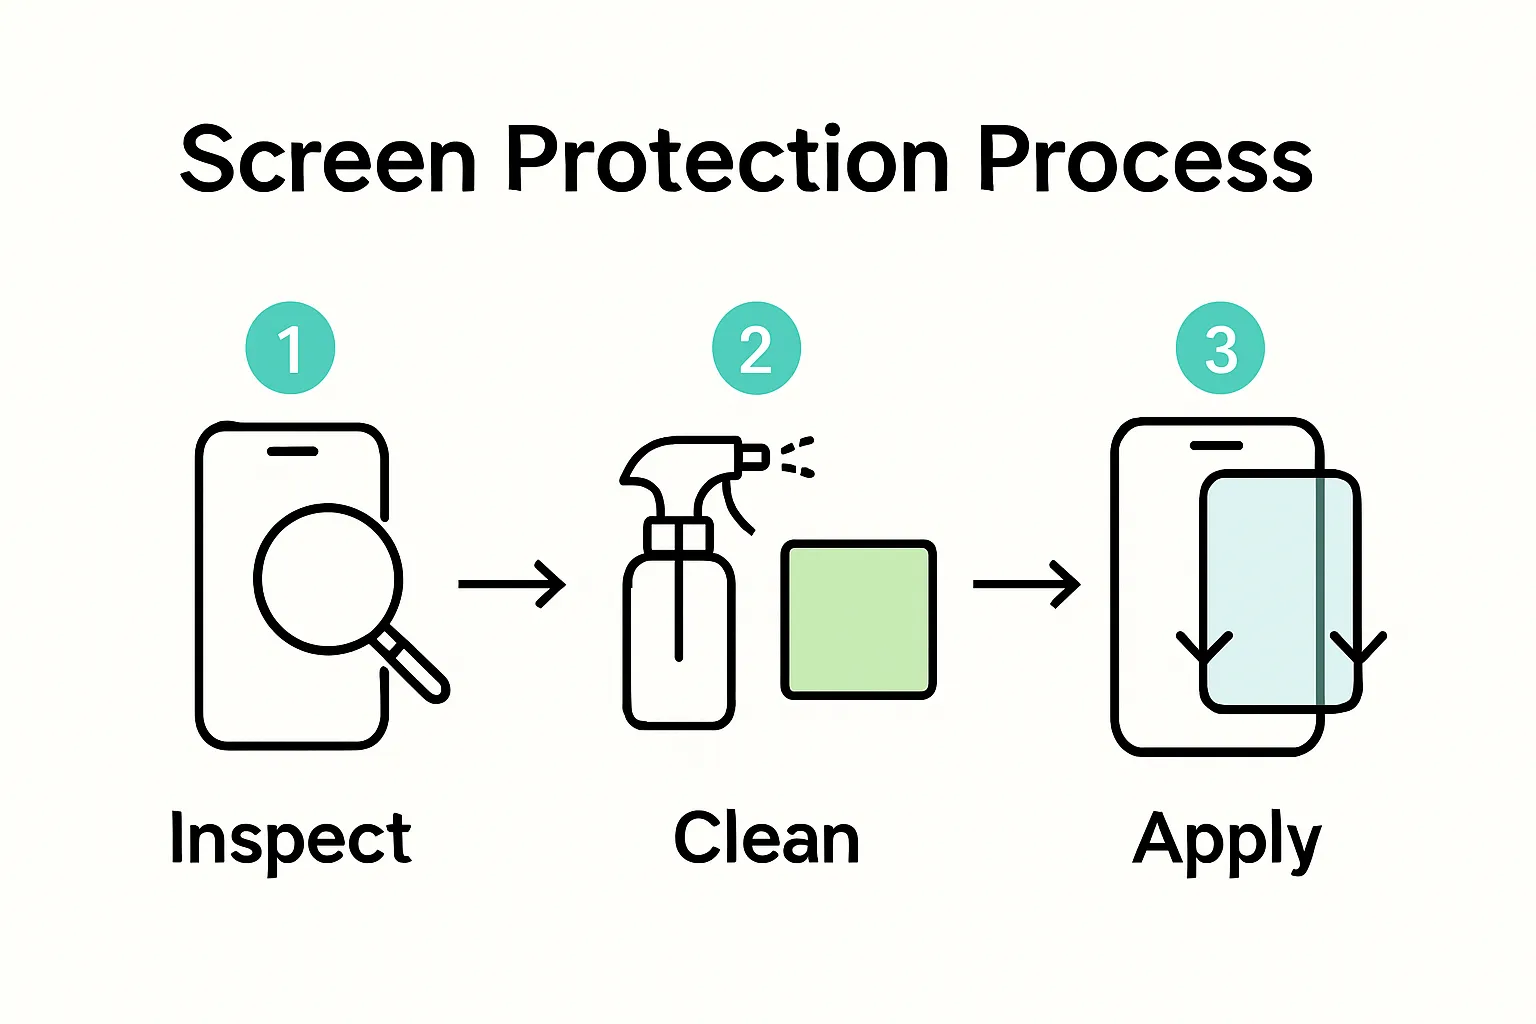
Step 1: Assess Your Phone Screen Condition
Protecting your phone screen begins with a comprehensive understanding of its current condition. Before diving into protective strategies, you need to conduct a thorough visual and functional assessment that will help you determine the most appropriate protection method.
Start by examining your phone screen under good lighting conditions. Look closely for existing scratches, micro-abrasions, or structural weaknesses that might compromise future screen protection efforts. Minor imperfections can quickly escalate into significant damage if not addressed early. Pay special attention to edges and corner areas, as these regions are typically most vulnerable to initial screen degradation.
Phone Tips & Tricks suggest using natural daylight or a bright lamp to illuminate your screen, which helps reveal even the subtlest surface irregularities. Run your fingertip gently across the screen surface, feeling for any uneven textures or tiny scratches that might not be immediately visible. Pro Tip: Once your protector is set, place your phone into a high-quality case like our iPhone Leather Wallet Case. The snug fit helps keep the edges of the protector from lifting over time.
Your assessment should also include a functional evaluation. Test touchscreen responsiveness by opening multiple applications and observing whether the screen registers touches accurately. Unresponsive areas or delayed reactions could indicate underlying screen damage that requires immediate attention. Check for any discolouration, dead pixels, or unusual display patterns that might suggest internal screen damage.
Documenting your findings is crucial. Take clear, well-lit photographs of any existing damage from multiple angles. These images will serve as a baseline reference, helping you track potential future deterioration and providing valuable documentation if you need professional screen repair or replacement.
Remember that different phone models and screen materials require unique protection approaches. A screen made from tempered glass will have different vulnerabilities compared to plastic or advanced ceramic screens. Understanding your specific device’s screen composition is the first step towards developing an effective protection strategy.
Step 2: Choose the Right Screen Protector
Selecting the appropriate screen protector is a critical step in safeguarding your phone screen, transforming your device’s vulnerability into robust defence. Your previous screen condition assessment will now guide you towards the most suitable protection strategy.
Tempered glass screen protectors represent the gold standard in screen protection. These high-quality shields offer superior impact resistance and provide a near-invisible layer of defence against scratches, drops, and everyday wear. When choosing a screen protector, prioritise thickness and hardness ratings. A protector measuring between 0.3 to 0.5 millimetres typically offers optimal protection without compromising touchscreen sensitivity.
Samsung Galaxy Tempered Glass Screen Protector experts recommend checking compatibility with your specific phone model. Not all screen protectors are universal, and an ill-fitting protector can introduce air bubbles, reduce touch responsiveness, or leave vulnerable screen areas exposed.
Consider the type of activities you typically engage in with your phone. Users with active lifestyles or those working in challenging environments might require more robust protection. Look for screen protectors with additional features like anti-glare coatings, privacy filters, or enhanced blue light reduction. These specialised options can provide extra functionality beyond basic screen protection. For those who want to keep their screen safe while simplifying their carry, our iPhone Card Slot Case offers a raised bezel that provides extra clearance for your protector.
Pay close attention to installation instructions. Many high-quality screen protectors include alignment tools, cleaning wipes, and detailed guidance to ensure bubble-free application. The installation process requires patience and precision. Work in a dust-free environment, clean your screen thoroughly, and follow the manufacturer’s instructions meticulously to achieve a flawless application.
Budget considerations are important, but avoid compromising on quality. A slightly more expensive screen protector can save you significant money by preventing costly screen repairs or replacements. Look for reputable brands with positive user reviews and warranty options. Your investment in a quality screen protector is an investment in your device’s longevity and performance.
Step 3: Clean the Phone Screen Thoroughly
Cleaning your phone screen is a critical preparation step that ensures optimal adhesion and performance of your new screen protector. A pristine surface is fundamental to achieving a flawless application, preventing air bubbles, dust particles, and potential installation imperfections.
Gather the right cleaning materials before starting. Avoid household cleaners, paper towels, or abrasive materials that can damage your screen. Instead, use a microfibre cloth specifically designed for electronics and a specialised screen cleaning solution. If you do not have a professional cleaning solution, a mixture of distilled water and isopropyl alcohol in equal parts works effectively. How to take a Screenshot on your Mobile Device guides often recommend similar cleaning techniques to maintain device screens.
Begin by powering off your device completely. This prevents accidental touches and allows you to see dirt and smudges more clearly. Hold your phone at an angle under bright, natural light to identify all surface imperfections. Gently wipe the screen using your microfibre cloth, using soft, circular motions to remove loose dust and fingerprints. Apply minimal pressure to avoid scratching the screen surface.
For stubborn marks or oils, lightly dampen a corner of the microfibre cloth with your cleaning solution. Never spray liquid directly onto the screen. Instead, apply the solution to the cloth first, ensuring it is just slightly damp, not wet. Gently sweep across the screen, focusing on areas with visible residue. Use a dry section of the cloth to immediately remove any moisture, preventing liquid from seeping into device ports or speaker grilles.
After cleaning, allow the screen to air dry for a few minutes. Use a fresh, dry section of the microfibre cloth for a final, gentle wipe to remove any remaining moisture or potential lint. Your screen should now appear crystal clear, with no visible streaks, dust, or smudges. This meticulous cleaning process creates the ideal surface for applying your screen protector, ensuring maximum adhesion and protection.
Below is a table summarising the essential tools and materials required for properly cleaning your phone screen before applying a screen protector, including their purpose and important usage notes.
| Tool/Material | Purpose | Usage Notes |
|---|---|---|
| Microfibre cloth | Removes dust, debris, and fingerprints | Use soft, circular motions; avoid abrasive materials |
| Cleaning solution | Cleans oils and residue | Use electronic screen cleaner or a distilled water/alcohol mix |
| Distilled water | Alternative for cleaning solution | Mix with isopropyl alcohol in equal parts if needed |
| Isopropyl alcohol | Disinfects and eliminates grease | Never use undiluted; always mix with distilled water |
| Bright light source | Helps identify all smudges and dust | Hold phone at an angle under light for better visibility |
| Dry section of cloth | Removes moisture after cleaning | Ensure the cloth is dry; prevents residue or streaks |
Step 4: Apply the Screen Protector Carefully
Applying a screen protector requires patience, precision, and a steady hand. This crucial step transforms your careful preparation into ultimate device protection, demanding a methodical approach to prevent common installation pitfalls.
Create an optimal installation environment before beginning. Choose a dust-free space with minimal air movement, such as a bathroom after a steamy shower or a clean room with closed windows. Static electricity can attract dust particles, so avoid carpeted areas or spaces with active air conditioning. Wash and thoroughly dry your hands to prevent transferring oils or dirt during the application process.
How to Personalize Phone Cases experts recommend laying out all installation materials beforehand. Most screen protector kits include alignment tools, dust removal stickers, and cleaning cloths. Unpack these carefully, keeping everything within immediate reach. If your protector comes with hinged alignment frames, use them to ensure precise positioning. These frames can be a game-changer for those struggling with perfect placement.
Begin the application by slowly peeling back the protective backing, exposing the adhesive side of the screen protector. Hold the protector by its edges to avoid touching the adhesive surface. Starting from one end, gently lower the protector onto your screen, using the alignment markers or frame as a guide. Many tempered glass protectors use a wet application method, which allows for slight repositioning. If bubbles appear, use the included squeegee or a credit card wrapped in the microfibre cloth to push them towards the edges.
Work methodically from the centre outwards, applying gentle, consistent pressure. Large air bubbles can be worked towards the screen’s edges, while tiny trapped dust particles might require carefully lifting and reapplying the protector. Some protectors come with additional adhesive dust removal stickers - use these to pick up any stubborn particles before final application.
After installation, allow the screen protector to settle for several hours in a stable environment. Avoid touching the screen or placing the device in tight spaces during this period. A perfectly applied screen protector should be virtually invisible, with no noticeable edges, bubbles, or misalignments.
Step 5: Verify the Application is Perfect
After carefully applying your screen protector, a thorough verification process ensures maximum protection and optimal performance. This final step transforms your careful preparation into a comprehensive shield for your device’s most vulnerable surface.
Illumination is your primary diagnostic tool. Turn on your phone and adjust the brightness to maximum, then examine the screen from multiple angles under bright, natural light. Look for telltale signs of improper installation such as air bubbles, dust particles, misalignment, or irregular edges. Small imperfections might seem insignificant initially but can compromise the screen protector’s effectiveness and aesthetic appeal.
Samsung Galaxy Tempered Glass Screen Protector specialists recommend a systematic inspection approach. Start from the screen’s centre and gradually move towards the edges, using your fingertip to gently trace the protector’s surface. Feel for any raised areas, bubbles, or uneven sections that might indicate installation issues. A perfectly applied screen protector should feel seamlessly smooth, with no perceptible transition between the protector and the original screen.
Test the touchscreen responsiveness comprehensively. Open various applications requiring different types of interactions - typing, swiping, pinching to zoom, and scrolling. Pay close attention to edge responsiveness and sensitivity. The screen protector should not interfere with your device’s standard tactile performance. If you notice any lag, unresponsive areas, or unusual touch behaviour, you may need to carefully remove and reapply the protector.
Conduct a final visual and functional assessment by testing your device in different lighting conditions. Move from bright sunlight to indoor lighting, checking for any distortion, glare, or colour shifts. A high-quality screen protector should maintain your screen’s original clarity and colour reproduction. Take photographs of the installed screen protector from multiple angles as a reference point, which can help you track any future wear or potential issues.
Remember that minor imperfections often settle naturally within 24-48 hours after application. If significant bubbles or misalignments persist, do not hesitate to carefully remove and reapply the screen protector, using the techniques outlined in previous steps.
Here is a quick troubleshooting table to help you identify and address common screen protector application issues using solutions already mentioned within the guide.
| Problem | Possible Cause | Solution |
|---|---|---|
| Air bubbles | Dust trapped or misalignment | Use squeegee or credit card from centre out; lift and retry |
| Dust under protector | Inadequate cleaning before application | Carefully lift protector, use dust removal sticker, reapply |
| Misalignment | Rushed placement or poor alignment | Remove and reposition using alignment tools or frames |
| Reduced touch response | Protector too thick or misapplied | Ensure correct thickness and reapply to correct placement |
| Visible streaks | Screen not fully dry or clean | Wipe with dry cloth; clean thoroughly before next attempt |
| Peeling edges | Improper adhesion or surface residue | Clean edges, press down with microfibre cloth |
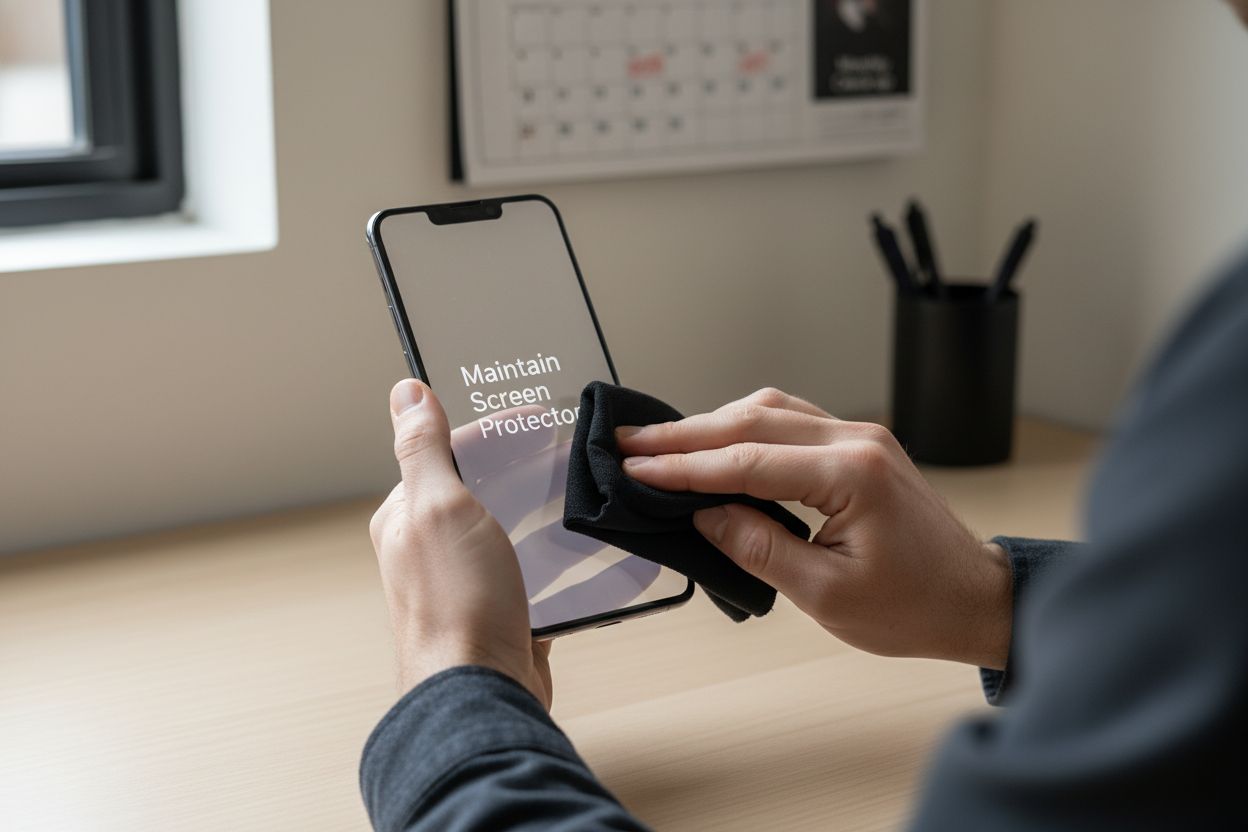
Step 6: Maintain the Screen Protector Regularly
Maintaining your screen protector is not a one-time task but an ongoing commitment to preserving your device’s primary defence mechanism. Regular care ensures longevity, optimal performance, and continued protection against daily wear and potential damage.
Clean your screen protector frequently using precise techniques. Invest in a high-quality microfibre cloth specifically designed for electronic screens. Avoid paper towels, clothing, or rough materials that might introduce micro-scratches. Gently wipe the screen in soft, circular motions, removing fingerprints, dust, and minor smudges. For more stubborn marks, slightly dampen the microfibre cloth with distilled water or a specialised electronic screen cleaning solution. Never use household cleaners or alcohol-based products that could compromise the protector’s adhesive properties.
The Unsung Hero of iPhone Protection highlights the importance of holistic device protection. Beyond cleaning, inspect your screen protector monthly for signs of wear, lifting edges, or developing scratches. Minor imperfections can often be temporarily mitigated by carefully pressing down lifted edges with a microfibre cloth. However, significant damage might necessitate complete replacement to maintain optimal screen protection.
Consider your daily environment and adjust maintenance accordingly. Users in dusty, outdoor, or high-activity settings might need more frequent cleaning. Keep your device away from extreme temperatures, direct sunlight, and abrasive surfaces that could accelerate screen protector degradation. When not in use, store your phone in a clean, protective case that prevents unnecessary friction or potential impacts. This is especially important for larger devices; our iPad Smart Case is designed to protect both the screen and the body during daily travel.
Develop a consistent maintenance routine. Set a monthly reminder to thoroughly clean and inspect your screen protector. During this check, look for subtle changes in screen clarity, touch responsiveness, or adhesive performance. Some screen protectors have self-healing properties that can diminish minor scratches over time, but this depends on the specific product’s technology.
Know when to replace your screen protector. Signs that indicate immediate replacement include widespread scratching, significant air bubble formation, peeling edges, or reduced touch sensitivity. A well-maintained screen protector typically lasts between six to twelve months, depending on usage and environmental factors. Proactive replacement ensures continuous, reliable protection for your device’s screen.
Complete Your Screen Protection Journey with StudioShake
You have just learned that tiny scratches and accidental drops can turn your phone into a source of stress, not joy. Everyday risks require more than quick fixes. True peace of mind comes from covering every vulnerable edge of your device. If you want reliable, lasting protection, start your upgrade in our Screen Protectors collection today and discover professional-grade solutions made for your lifestyle.

Ready to eliminate worry and keep your device immaculate? Visit StudioShake for our full range of technology accessories and superior phone care products. Make your next move now to enjoy long-lasting screen clarity and confidence in every swipe.
Frequently Asked Questions
How can I assess the condition of my phone screen before applying a protector?
To assess your phone screen condition, examine it under good lighting for scratches or imperfections, test touchscreen responsiveness, and document any existing damage for future reference.
What type of screen protector offers the best protection for my device?
Tempered glass screen protectors provide superior impact resistance and scratch protection, making them the gold standard for phone screen protection. Look for ones with thicknesses between 0.3 to 0.5 millimetres for optimal performance.
How do I properly clean my phone screen before applying a screen protector?
Power off your device, use a microfibre cloth with a specialised cleaning solution or a mix of distilled water and isopropyl alcohol, and avoid applying liquid directly to the screen. Wipe in soft, circular motions and ensure the screen is dry before application.
What steps should I follow to apply a screen protector without getting bubbles?
Create a dust-free environment, peel back the protector’s backing gently, align it carefully on your screen, and use a squeegee or credit card to push out any bubbles from the centre to the edges, working patiently for a flawless application.
Recommended
- 7 Durable Phone Case Features Every Parent Should Know – StudioShake
- The Unsung Hero of iPhone Protection: Why I Love My Silicone Case – StudioShake
- Choosing Safe Phone Accessories: A Parent’s Guide in London – StudioShake
- What is a Slim Phone Case? Understanding Its Importance – StudioShake
- Replacing Cracked Phone Screens: A Step-by-Step Guide – buy2fix