

Effective Phone Cover Cleaning Process for Parents
Every parent faces that moment when a quick glance at their child’s phone cover reveals smudges, grime, or sticky fingerprints. With phones constantly in use at home and school across London, cleanliness is about more than just appearance—it’s about keeping families healthy. By gathering the right cleaning supplies and following material-specific recommendations, you can confidently maintain both your child’s device hygiene and its longevity with ease.
Table of Contents
- Step 1: Gather Essential Supplies For Cleaning
- Step 2: Remove The Phone Cover Safely
- Step 3: Clean The Phone Cover Thoroughly
- Step 4: Dry And Inspect The Phone Cover
- Step 5: Reattach The Phone Cover Securely
Quick Summary
| Key Point | Explanation |
|---|---|
| 1. Gather essential cleaning supplies | Collect microfibre cloths, cotton swabs, and isopropyl alcohol for effective cleaning. |
| 2. Safely remove the phone cover | Take care when removing the cover to avoid damage; use gentle pressure and proper techniques. |
| 3. Clean the phone cover thoroughly | Use mild soap and warm water; focus on edges and textured areas for a complete clean. |
| 4. Dry and inspect the cover carefully | Pat the cover dry with a lint-free cloth; check for damage before reattaching. |
| 5. Reattach the cover securely | Align and press the cover onto the phone; ensure it fits snugly to provide proper protection. |
Step 1: Gather essential supplies for cleaning
Before diving into cleaning your phone cover, you need to collect the right equipment. Think of this like preparing for a small household mission where precision and the correct tools make all the difference. Infection prevention guidelines emphasise selecting appropriate cleaning supplies based on your specific needs.
Your essential toolkit should include microfibre cloths these are gentler than regular towels and will prevent scratching your phone cover soft cotton swabs for reaching tight corners, isopropyl alcohol solution for disinfecting rubber and plastic surfaces mild dish soap for thorough cleaning and warm water. If your phone cover is made from delicate materials like leather or specialised fabric you might want to select a cleaner specific to that material. Healthcare cleaning standards recommend using appropriate disinfectants that match the surface material.
Additionally consider having disposable gloves to protect your hands and prevent transferring additional bacteria during the cleaning process. Paper towels or a clean lint free cloth for drying will complete your cleaning kit. Select white or light coloured cloths to easily spot any dirt or residue youre removing.
Pro tip: Store your cleaning supplies in a dedicated container to keep them organised and readily available for quick phone cover maintenance.
Use this reference table to identify supplies and their best uses in phone cover cleaning:
| Cleaning Supply | Primary Use | Key Benefit |
|---|---|---|
| Microfibre cloth | Wiping surfaces, drying | Prevents scratches |
| Cotton swabs | Cleaning edges, crevices | Reaches difficult spots |
| Isopropyl alcohol | Disinfecting, removing bacteria | Kills most germs |
| Dish soap | General cleaning solution | Removes grime usefully |
| Disposable gloves | Protecting hands | Reduces bacteria transfer |
| Lint-free paper towel | Drying after cleaning | Prevents water spots |
Here is a quick comparison of recommended cleaning methods for different phone cover materials:
| Phone Cover Material | Optimal Cleaning Solution | Additional Care Advice |
|---|---|---|
| Plastic / Rubber | Mild soap, isopropyl alcohol | Avoid strong solvents |
| Silicone | Mild soap, warm water | Use gentle circular motions |
| Leather | Special leather cleaner | Avoid water, condition regularly |
| Fabric / Cloth | Mild soap, cold water | Air dry only, no heat |
Step 2: Remove the phone cover safely
Removing your phone cover requires precision and gentleness to prevent potential damage. Careful device handling guidelines recommend taking a methodical approach to protect both your phone and its protective cover.
Start by placing your phone on a clean flat surface with plenty of light. Most phone covers have specific removal points typically along the edges or corners. Grip the cover firmly but carefully using your thumbs and index fingers applying even pressure. For rigid cases begin at a corner and slowly peel back the material while for softer silicone or rubber cases gently stretch and wiggle the cover to loosen its grip. Avoid pulling abruptly which could potentially crack or damage the cover or scratch your phone surface.
If you encounter resistance do not force the cover. Some phone cases particularly those designed for maximum protection might require specific techniques. Check whether your case has release buttons or specific areas designed for easier removal. Take your time and maintain a steady gentle pressure to gradually separate the cover from your device.
Pro tip: Always remove your phone cover over a soft surface like a clean towel to prevent accidental drops during the process.
Step 3: Clean the phone cover thoroughly
Cleaning your phone cover requires a systematic approach to ensure complete removal of dirt and potential bacteria. Comprehensive cleaning protocols recommend selecting cleaning methods tailored to your specific phone cover material.
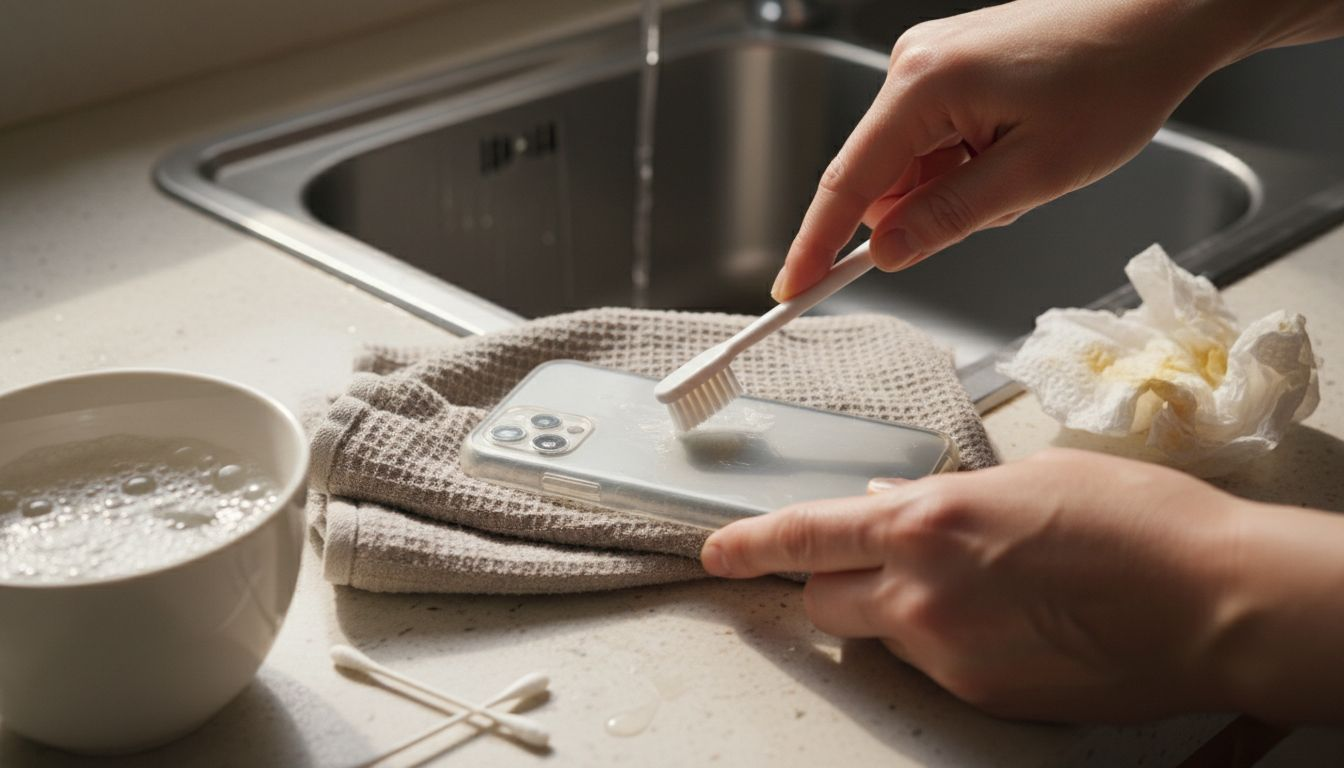
Prepare a cleaning solution by mixing a small amount of mild dish soap with warm water. For harder plastic or rubber cases dip a soft microfibre cloth into the solution and wring it out thoroughly so it is damp not soaking. Gently wipe every surface of the phone cover paying extra attention to edges and corners where grime tends to accumulate. For silicone cases use gentle circular motions to lift dirt without damaging the material. If your cover has textured areas use a soft cotton swab to reach into small crevices ensuring a thorough clean.
For more stubborn stains or bacteria consider using isopropyl alcohol solution but apply sparingly and only on appropriate materials. Always test a small inconspicuous area first to ensure the cleaning solution will not discolour or damage your phone cover. Once cleaning is complete use a dry microfibre cloth to remove any remaining moisture and prevent water spots.
Pro tip: Allow your phone cover to air dry completely before reattaching it to your device to prevent moisture trapped between the cover and phone.
Step 4: Dry and inspect the phone cover
After cleaning your phone cover the final stage involves careful drying and thorough inspection. Parental device maintenance guidelines recommend a systematic approach to ensure your phone cover is completely dry and undamaged.
Begin by selecting a clean lint free cloth preferably white to help you spot any remaining dirt or debris. Gently pat the phone cover dry using soft dabbing motions rather than rubbing which might cause scratches. Pay special attention to textured areas seams and corners where moisture can easily get trapped. Hold the cover up to good lighting and rotate it slowly examining every surface for potential cracks small tears or areas of discolouration that might have occurred during cleaning.
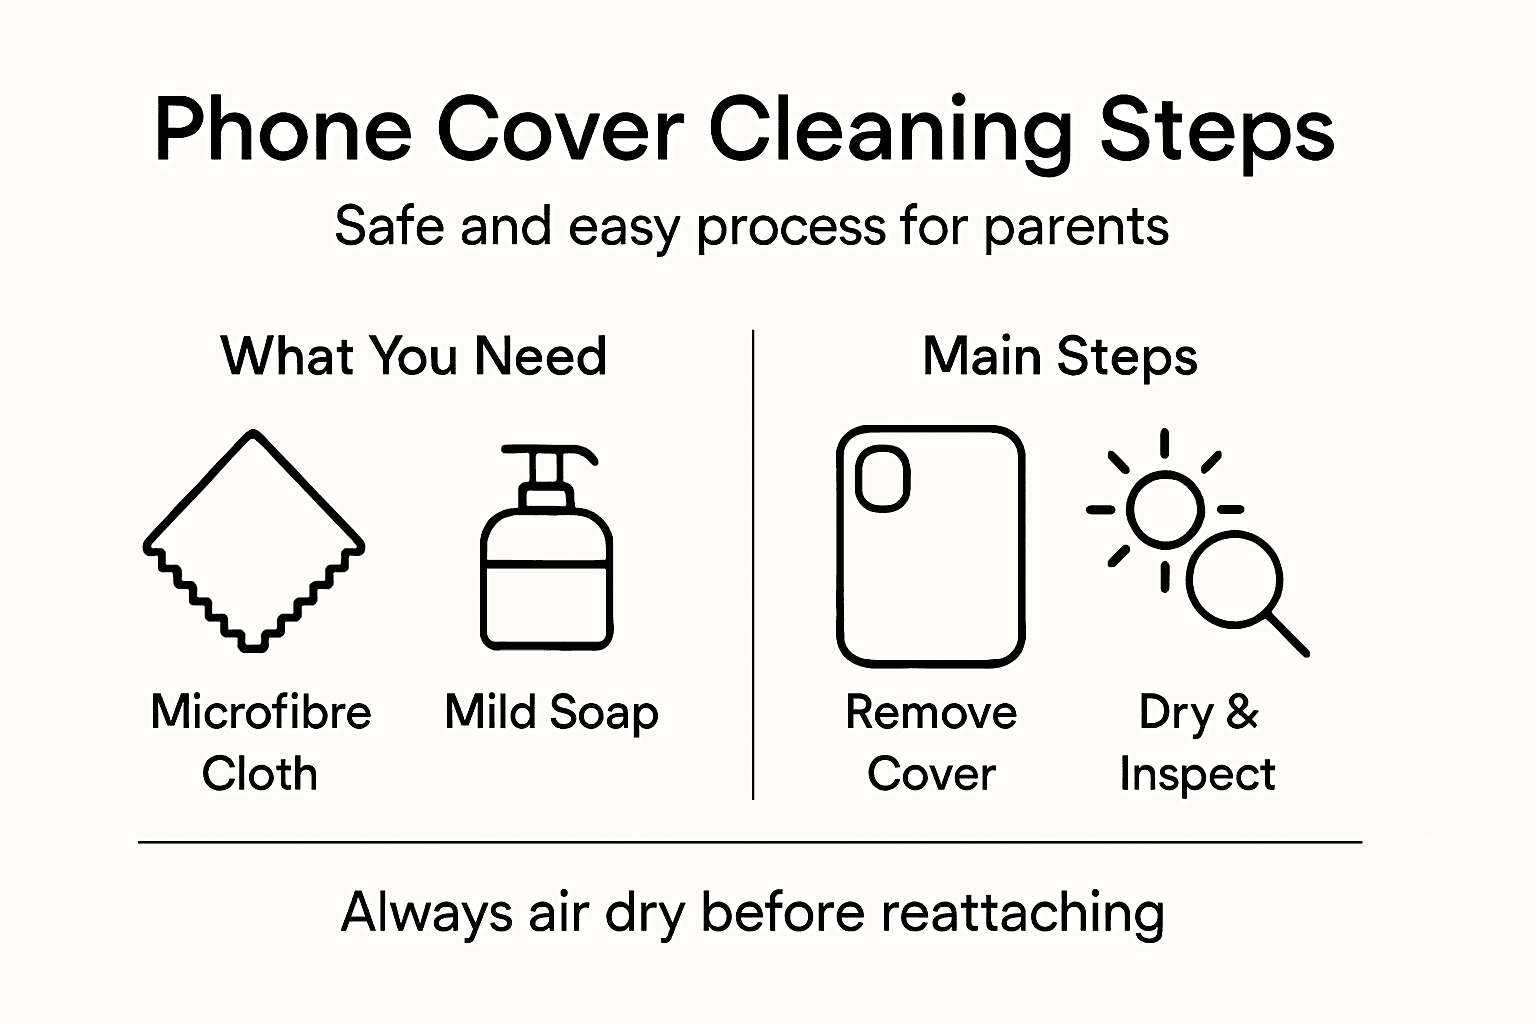
If you notice any damage such as small cracks or weakening of the material consider replacing the cover to maintain proper protection for your device. Make sure the cover is absolutely dry to the touch with no residual dampness before reattaching it to your phone. This prevents potential moisture damage to your electronic device and ensures a clean hygienic phone cover that looks and functions like new.
Pro tip: Keep a microfibre cloth specifically dedicated to phone cover drying to prevent introducing new dirt or lint during the final inspection process.
Step 5: Reattach the phone cover securely
The final stage of your phone cover cleaning process involves carefully reattaching the cover to ensure maximum protection and functionality. Mobile device safety guidelines emphasise the importance of securing phone covers correctly after cleaning.
Begin by ensuring your phone is completely dry and the cover has no residual moisture. Align the cover precisely with your phone starting at one corner and gradually working your way around the edges. For snap on covers apply gentle even pressure ensuring each clip or attachment point clicks securely into place. With silicone or rubber cases stretch the material carefully making certain it fits snugly without any gaps or loose areas that might compromise device protection.
Check the fit by running your fingers around the edges feeling for any areas that might not be fully seated. Gently press along the perimeter to confirm the cover is completely attached with no potential entry points for dust or moisture. If your phone case has specific alignment markers or designated attachment points use these as guides to guarantee a perfect fit. A well attached cover will feel smooth and seamless with no raised edges or visible separation between the cover and device.
Pro tip: Perform a gentle drop test on a soft surface to confirm your phone cover is securely attached before resuming normal use.
Protect Your Phone Cover with StudioShake’s Durable Cases
Keeping your phone cover clean and well-maintained is essential for protecting your device from dirt and damage but sometimes even the best cleaning process cannot prevent wear and tear. If you are looking for reliable and stylish phone covers that are easy to clean and provide lasting protection explore our £1 Case Collection – StudioShake. These affordable options help you keep a fresh look without compromising on safety.

Choose from a wide range of top-quality designs tailored for different materials and protection levels by browsing our Our Bestsellers – StudioShake. Act now to give your phone the care it deserves and enjoy peace of mind knowing your cover is both clean and secure. Visit StudioShake today and find the perfect cover that simplifies maintenance and fits your lifestyle.
Frequently Asked Questions
How do I safely remove my phone cover for cleaning?
To safely remove your phone cover, place your phone on a clean, flat surface. Grip the cover firmly at the edges and gently peel it back, starting at a corner while applying even pressure to prevent damage.
What supplies do I need for cleaning a phone cover?
You will need microfibre cloths, cotton swabs, isopropyl alcohol, mild dish soap, warm water, disposable gloves, and lint-free paper towels. Gather these items before starting the cleaning process to ensure efficient use.
How can I clean a silicone phone cover effectively?
To clean a silicone phone cover, prepare a solution of mild dish soap and warm water. Use gentle circular motions with a damp microfibre cloth to lift dirt, making sure to clean the edges and crevices thoroughly without damaging the material.
What should I do if my phone cover has stubborn stains?
For stubborn stains, dab a small amount of isopropyl alcohol onto a cotton swab and gently apply it to the stained area. Always test a small inconspicuous section first to ensure it does not discolour or damage the cover.
How do I know when to replace my phone cover?
Inspect your phone cover for cracks, tears, or discolouration after cleaning. If you notice any damage that could affect protection, consider replacing the cover to ensure your device remains safe from potential harm.
What should I do after cleaning to ensure the phone cover is dry?
After cleaning, gently pat the phone cover dry with a lint-free cloth and check for any remaining moisture in textured areas. Allow it to air dry completely before reattaching it to your phone to prevent moisture damage.
Recommended
- Phone Case Maintenance – Protecting Family Devices – StudioShake
- How to Clean Phone Cases Safely and Effectively – StudioShake
- Complete guide to anti-germ phone cases for families – StudioShake
- Top Phone Case Longevity Tips for Busy Parents UK Guide – StudioShake
- Descubre los mejores consejos para cuidar tu piel y lucir impecable